Sprite Stitch Stitch-a-Long Week 4

For the final week of the Sprite Stitch stitch-a-long we were able to choose our favourite from the submitted designs to stitch. The Elder Scrolls V: Skyrim is hands down one of my all time favourite video games. It is second only to World of Warcraft for the number of hours it has sucked from my life – and it was worth every one of them. So I knew my final square would have to be one of the two great Skyrim designs that were submitted to the stitch-a-long.

Here are the Skyrim patterns I had to choose from:

Skyrim stitch-a-long patterns

The first was created by Pyper and provides room to experiment with some blackwork. The second was created by BooChocoBoom and is hard to resist if you have a soft spot for the Thieves’ Guild.

I loved the idea of trying my hand at some blackwork and originally started into that pattern. However, it became apparent that within the context of my entire project the blackwork just didn’t fit in and made this pattern stand out heavily from the rest. So I pulled out the stitches and opted to commemorate the Theives’ Guild instead.

Here’s the final square:

Skyrim Thieves' Guild cross stitch

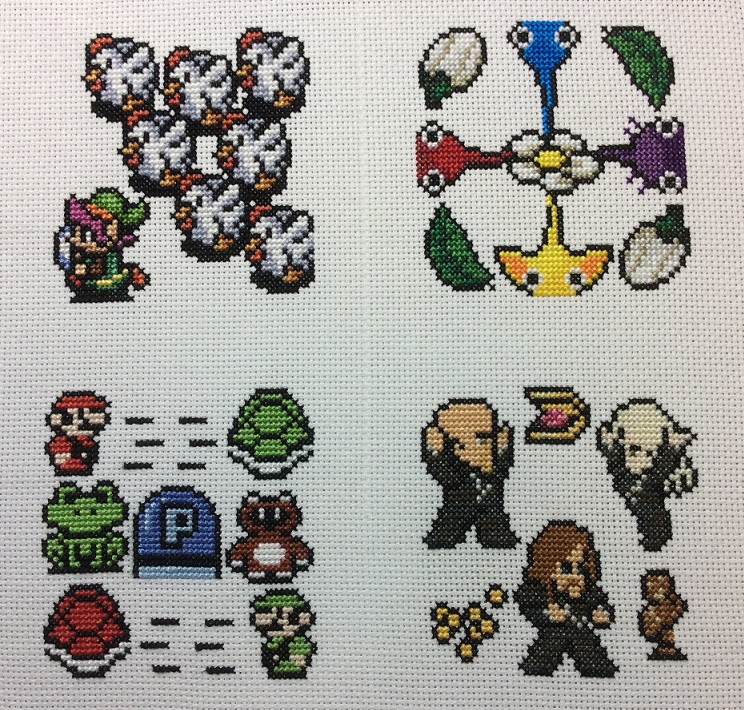
I’m not very happy with how the yellow for Devlin’s goatee blends in with the rest of his face. I literally tried eight different shades of yellow and didn’t like any of them. I may still pull it out and make it brown instead. It wouldn’t be true to the game, but at least it would be noticeable that way. Does anyone have any suggestions?

Here’s my official finished sampler:

Sprite Stitch stitch-a-long sampler

Although the official stitch-a-long is over, I am still planning to stitch another twelve squares for display in a multi-frame, so be sure to watch for more updates. You can also check out the rest of the stitch-a-long group’s progress over on Sprite Stitch.

Shrink Plastic Akatosh

I’m having a blast trying out some different techniques for shrink plastic and have found that a really intricate look can be achieved by simply cutting a shape from plain white shrink plastic. As a huge Elder Scrolls: Skyrim fan I decided to have a go at a shrink plastic Akatosh. I started with the Akatosh silhouette created by RocketmanTan on DeviantArt, resized to approximately 5-inches tall. I printed off the image and carefully cut away all the black with a small pair of scissors and a craft knife. I then traced the stencil onto a piece of white shrink plastic and again carefully cut away the image.Shrink plastic Akatosh stencil

A little bit of shaping and the final piece was ready to shrink.
Pre-shrinking shrink plastic Akatosh pendant

This is where I learned that intricately cut items don’t play nice in the toaster oven. I wish I had some pictures of what this did, but I was too busy trying to fix it to snap any. The entire thing managed to completely twist in on itself with the bottom piece curling up and right through the hole in the centre of the image forming a knot. It turns out, however, that shrink plastic is pretty amazing stuff and with enough patience you can fix almost anything. I spent close to ten minutes repeatedly returning the piece to the oven until it started to soften and then removing it and carefully trying to untwist the work. Eventually I did get it untwisted but finally gave up when it came to straightening the sides.

Misshapen shrink plastic Akatosh pendant

I think with enough return trips to the oven I could have eventually straightened it out, but it would never quite be perfect due to the extra stretch the plastic endured from twisting.

Instead I opted to start again, this time leaving more plastic around the outside of the image in the hopes that this would help prevent the plastic from twisting in on itself.

Success!

Finished shrink plastic Akatosh pendant

I’m pretty pleased with how this turned out. People I have shown it to think it was either laser cut or 3D printed. But no, it was just a piece of plastic in my toaster oven.