Chainmaille Jewellery

I’ve been busy making chainmaille jewellery again. The first one is a necklace from the book Chain Mail Jewelry by Terry Taylor and Dylon Whyte. It’s based on a standard European 4-in-1 weave and uses 20g (AWG) 1/8″anodized aluminum rings and size 6 seed beads.

Beaded European 4-1 chain mail necklace

Beaded European 4-1 chain mail necklace

This is one of my favourite pieces I have made so far and I actually wear it quite frequently. I have a sweater that matches the bead colour perfectly and I think it ends up looking quite striking!

Next up is a dragonscale weave bracelet. To make this one I followed the beadaholique video tutorial. I really love the look of the dragonscale weave, but I’ll tell you, it took forever to make, so I’m very glad I was only planning for a bracelet. The outer rings are 18g (SWG) 1/4″ silver anodized aluminum, and the inner rings are 19g (SWG) 5/32″ green anodized aluminum.

Dragonscale chain mail bracelet

I think the finished bracelet looks pretty cool, but it’s a little too bulky for my tastes so I don’t know how often I will actually wear it. I am however, quite taken with chainmaille so I’m sure there will be more pieces to come!

Chainmaille Button Bracelet

When I find myself with a day off with no obligations I usually end up reaching for my current cross stitch WIP. But for some reason it just wasn’t calling to me the other day, so I ended up rummaging through my craft cupboard for inspiration instead. What I found was this adorable container of buttons I couldn’t resist buying at Michael’s awhile ago.

Container of multi-sized grey buttons

I had no real plan for these when I bought them but have since seen a number of chainmaille button bracelets and thought these would work well for that. So out came the jump rings.

I started with a simple base chain of single jump rings. I used 18 gauge (SWG) rings with a 5/32 inch inner diameter. The final chain was 40 rings long (I think the one in the picture is a little longer, but I ended up removing a few rings at the end). Attach a closure of your choice to one end of the chain.

Base chain for button bracelet

Next comes the fun part, start attaching buttons. I didn’t have much of a system for this. I had seven different sizes of buttons, so I simply tried to alternate larger buttons with smaller buttons. I used whatever size jump rings I happened to have that would nicely fit through the button and base chain without leaving too much extra ring. (This is a great project for using up random left over rings from other projects!). I tried to alternate adding buttons above and below the base chain, although, since the chain twists, this became harder and harder to do as more buttons were added.

Five buttons added to the base chain

I added a single button to every ring of the base chain except three rings on either end, which helps make the bracelet a little easier to put on. Here’s the final result:

Button chainmaille bracelet

Pretty cute, right? I don’t wear a lot of costume jewellery, so if I made another one I think I would only use smaller sized buttons, but since the goal here was to use up the buttons I had, I’m pretty pleased with how it turned out. I think there’s also a lot of room to vary the sizes and colours of buttons to achieve different looks. I’m picturing a bracelet starting with the largest buttons in the middle working out to smaller buttons on either end instead of the randomly positioned sizes I used. I guess I’m going to have to go shopping for more buttons. So much for actually clearing something out of the craft cupboard!

HyperLynks Chainmaille

Hands down, my favourite thing I did at the Creativ Festival in Toronto was a chainmaille workshop with Michelle Brennan from HyperLynks. Michelle is a former high school teacher who left her teaching career to follow a passion for chainmaille and co-found the company HyperLynks. She is the designer of many beautiful chainmaille jewellery kits, while her husband makes all the jump rings.

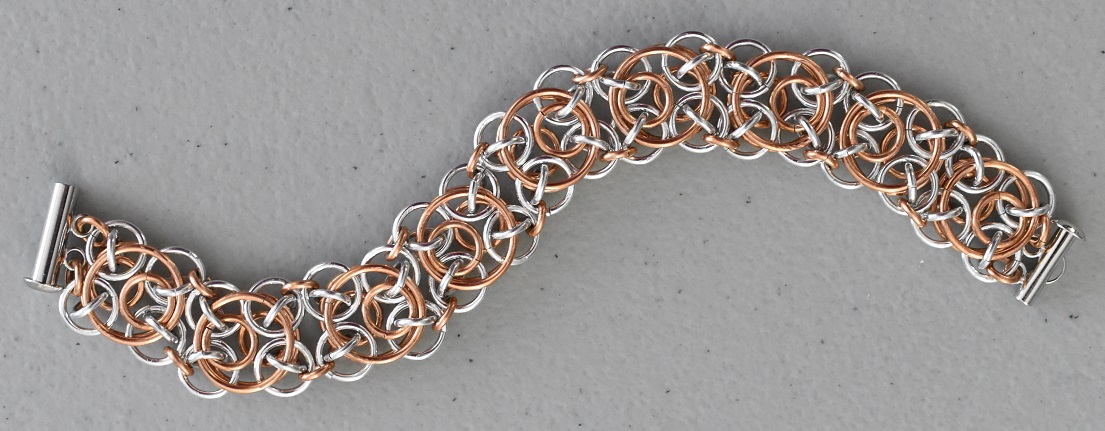
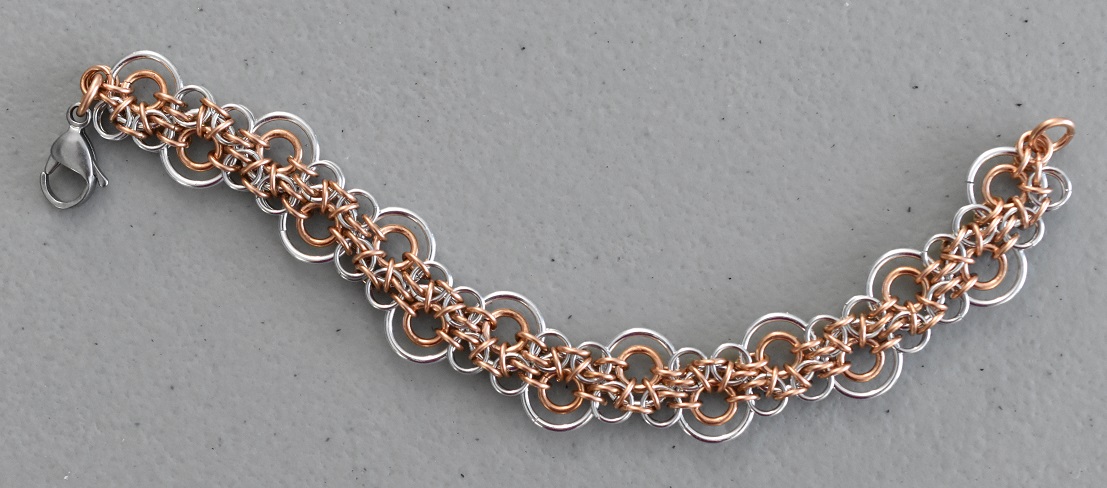
With a background in education, Michelle has the talent and patience (as well as the incredible sense of humour!) needed to guide even the most novice chainmailler through the steps to create complex weaves. In this workshop she taught her Clockwork Weave as we created a bracelet using bronze and aluminum rings. Here’s the final product:

Clockwork weave chainmaille bracelet

I’ve done a small amount of chainmaille before and enjoyed it, but this class really got me excited about the craft. I think it’s impossible to take a class with Michelle and not have some of her enthusiasm wear off on you.

After the class I immediately headed off to the HyperLynks booth in the exhibit hall to spend all of my money. I picked up three more of Michelle’s kits as well as three pairs of Xuron pliers. I was previously unfamiliar with Xuron pliers but they are absolutely wonderful for crafting. They are small and lightweight making them very well suited to intricate work. Michelle even worked with the company to design a pair of bent-nose pliers with a 90-degree bend, so of course I couldn’t leave the expo without those!

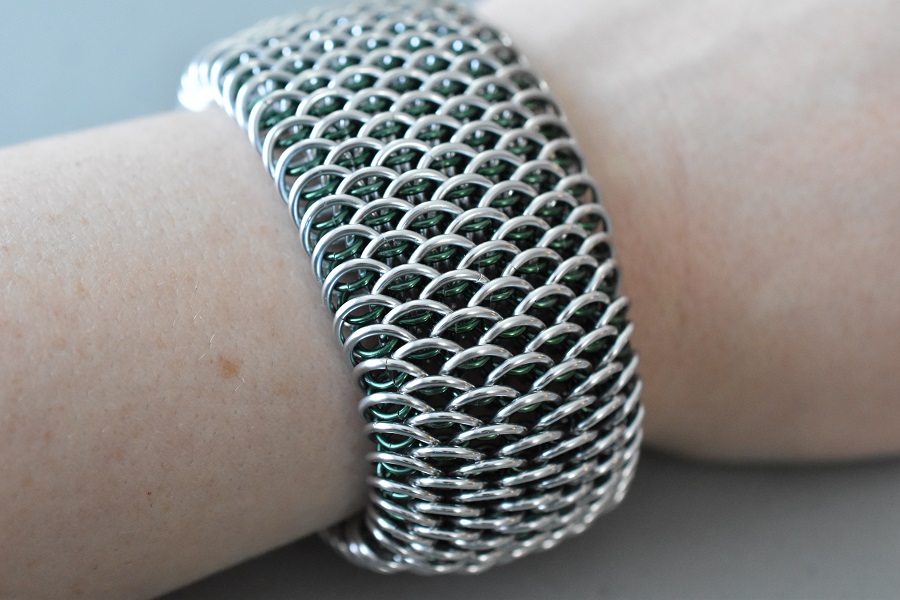
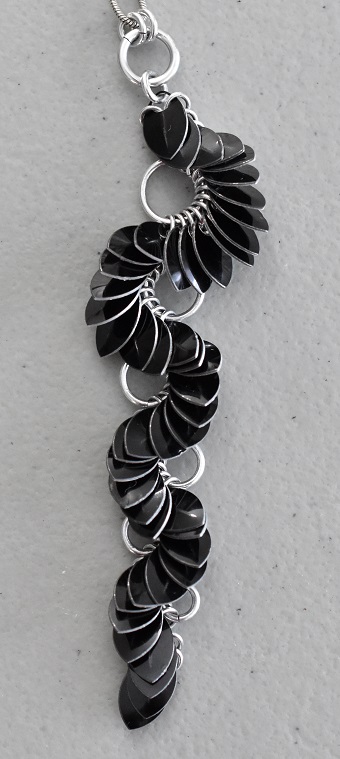
I’ve been chainmaille-ing like mad since returning home from the conference. First up is the Trellis necklace. I’ve never worked with scales before but these small (1/2 inch long), black scales make for an incredibly striking necklace:

Trellis chainmaille necklace

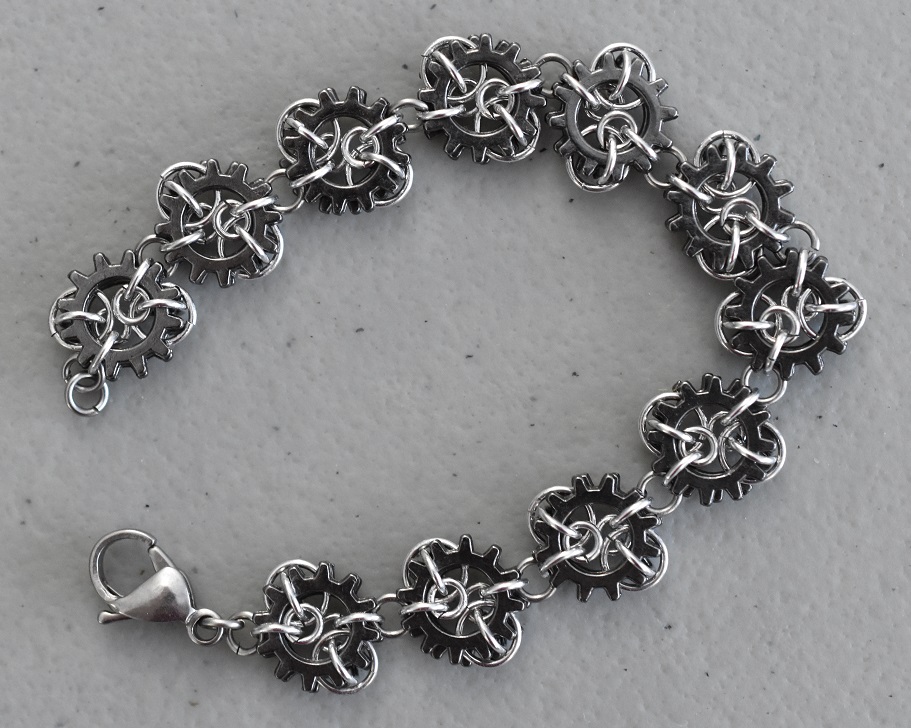
My favourite of the items I’ve made is the Micro Cogs bracelet. It’s not for the novice chainmailler (my husband had to deal with a lot of grumbling and a few unlady-like exclamations while I was working on this one). Each of the the cog units are only a 1/2 inch across.

MIcro cogs chainmaille bracelet

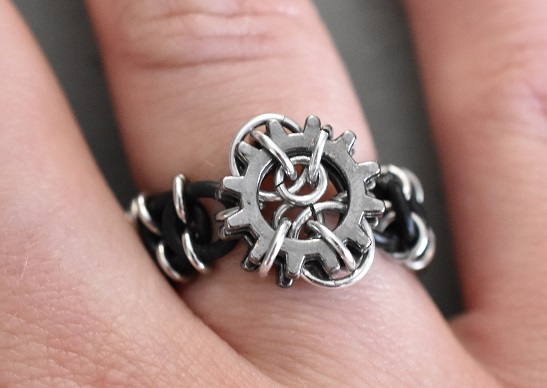
This kit also came with the instructions and materials for a matching ring. The band on the ring is made from rubber rings in addition to the aluminum jump rings. I’m not in love with the band as I think it somewhat distracts from the cog, so I may come up with another band option. But I love the concept, and it’s surprisingly comfortable to wear.

Micro cogs chainmaille ring

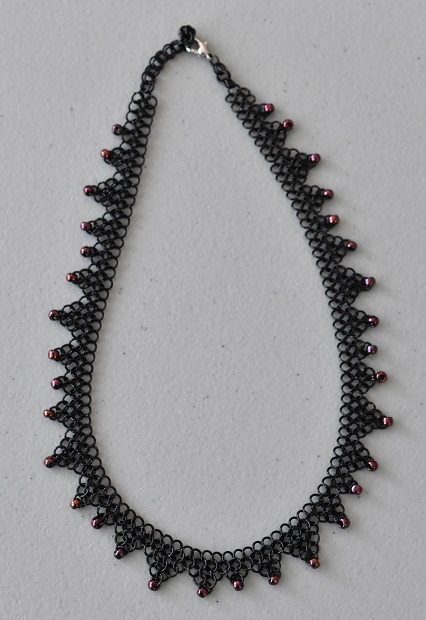
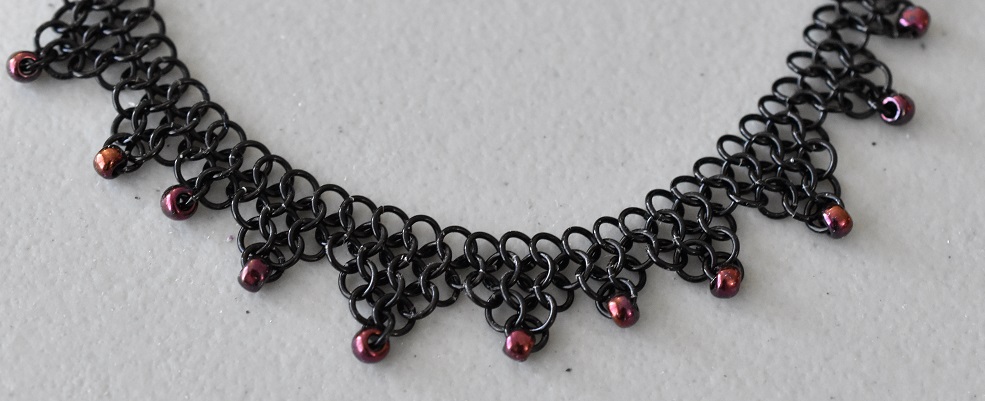
Last up is the Infinity Weave. I love the intricacy of this one and the subtle wave shape.

Infinity weave chainmaille bracelet

I’m incredibly happy with how all of these pieces turned out, and although some of the kits were challenging, the instructions were fantastic – detailed and full of a ton of full colour photos.

HyperLynks don’t sell any products directly through their website, but they do list the stores where the products are available. And if you happen to live near Newmarket, Ontario, Michelle regularly offers chainmaille workshops at That Bead Lady. Sign up for one. Trust me, you won’t regret it. Although once you try out this amazing craft, your wallet might!