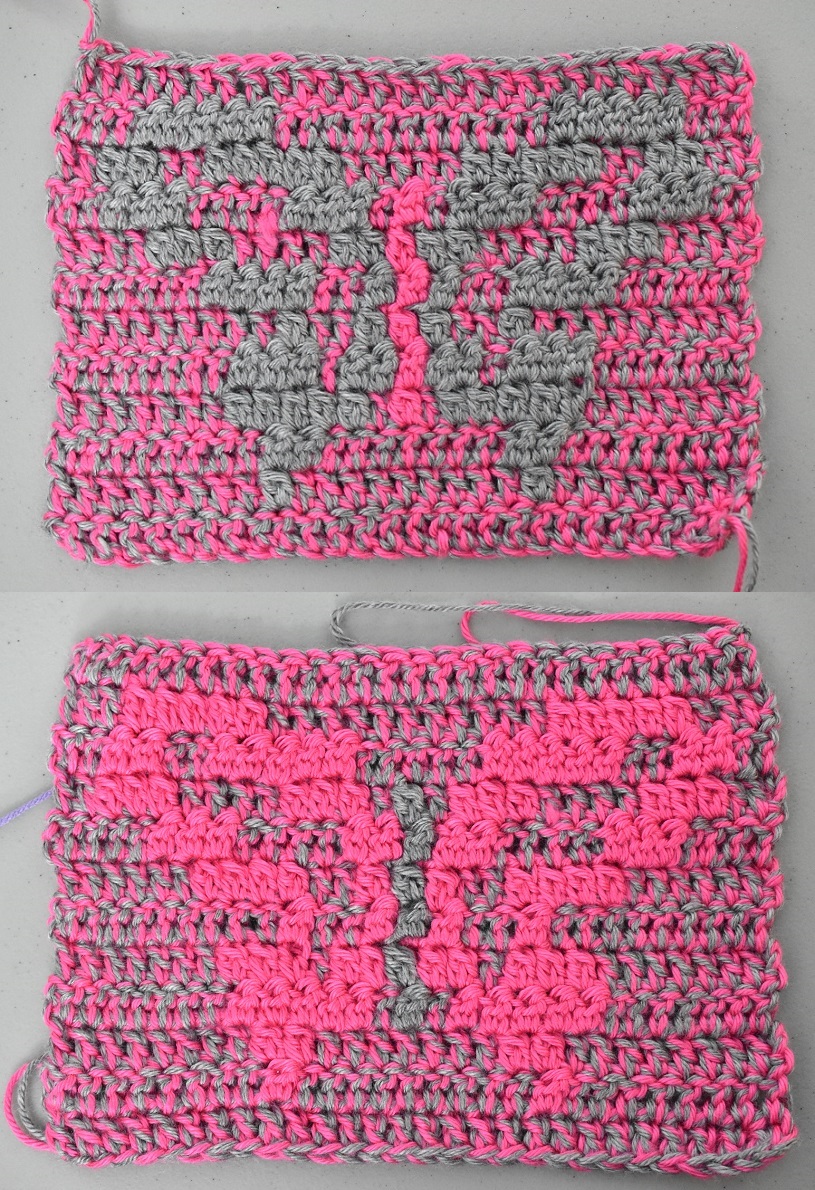
I’m still working through projects from the Creativ Festival. This one is reversible image crochet from a workshop by Sonja Hood. The concept is similar to double knitting in that it creates matching images on both sides of the work. I was completely blown away by this technique and can see a lot of great uses for it. It’s worked using two contrasting strands of yarn together making a very thick fabric – perfect for dishcloths or really warm blankets.
Below are the samples I stitched followed by a detailed tutorial on how to crochet reversible images.


Tutorial
Reversible image crochet is created using double crochet with two strands of yarn held together. For best results choose two yarns of highly contrasting colours. The image portion is created by working the front loop and back loop separately, using a stitch that I’m going to call puffy double crochet, because I don’t remember what it was actually called. It’s essentially worked as if you were making a double crochet two together but into a single stitch instead of across two stitches.
Ready?
Holding two strands of yarn together, chain your desired number of stitches and complete a row a double crochet. I’m making the skull above, so the pattern is 12 stitches wide. With worsted weight yarn I used a 6mm hook.

The second row of the skull pattern has 4 regular stitches, 4 image stitches and another 4 regular stitches. Work the first four double crochets up to the point where the image begins.
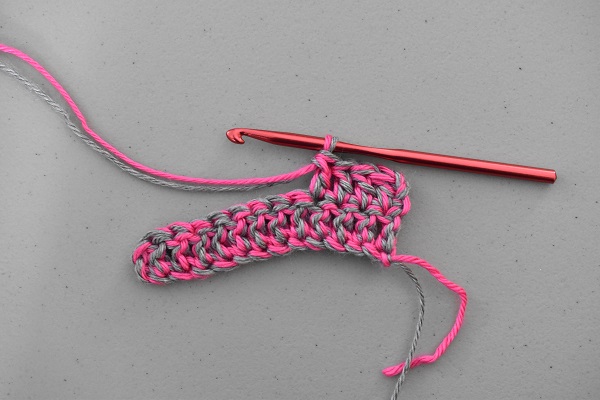
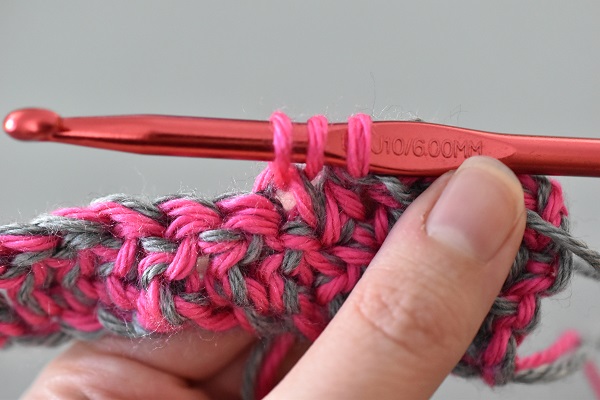
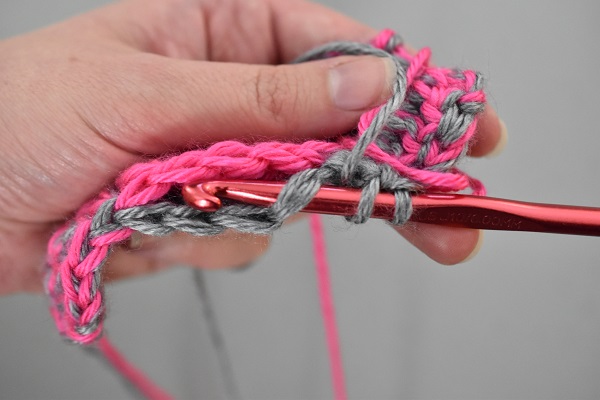
To get ready for the first stitch of the image, extend the loops that are currently on the hook.
Remove one colour loop from the hook (in this case grey) and tighten up the loop of the other colour (in this case pink) so it is ready to use.
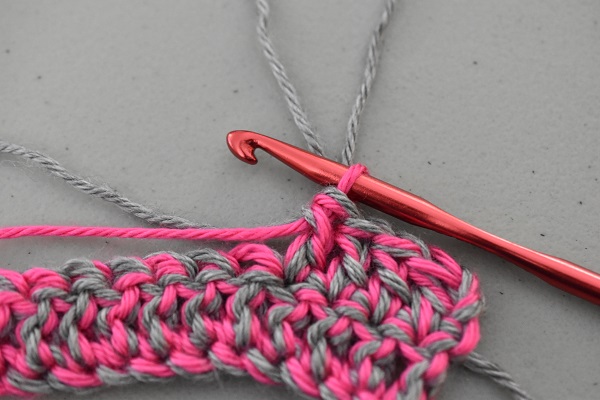
Yarn over and insert the hook into the front loop only of the next double crochet.

Yarn over and pull up a loop (three loops on hook).
Yarn over and pull through two loops on the hook (two loops remain).
 Yarn over and insert into the same front loop of the same double crochet to pull up another loop (4 loops on hook).
 Yarn over and pull through two loops (three loops remain).
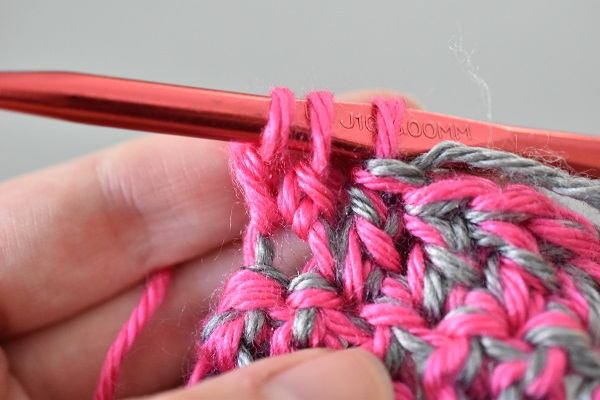 Yarn over and pull through all three loops. This completes the first half of the puffy double crochet.

To get ready to complete the second half of the stitch, extend the pink loop that is currently on the hook and remove it from the hook. (Extending the loop is just to make sure it doesn’t get pulled back into your work and unravel the crochet). Put the grey loop back on the hook and tighten it up so it’s ready to use.
 Yarn over and insert the hook into the unworked back loop of the same stitch the pink stitches were worked into.

Yarn over and pull up a loop (three loops on hook).

Work the rest of the stitch the same way as the pink stitch:
Yarn over and pull through two loops (two loops remain).
Yarn over and insert into the same back loop to pull up a loop (four loops on hook).
Yarn over and pull through two loops (three loops remain).
Yarn over and pull through all three loops.
That completes both halves of the puffy double crochet stitch.

Continue working the rest of the image stitches in this same way. Once the needed number of stitches are completed (a total of four stitches in this case), place both loops back on the hook to continue on.

Work the remaining stitches as normal double crochet stitches using both strands of yarn.
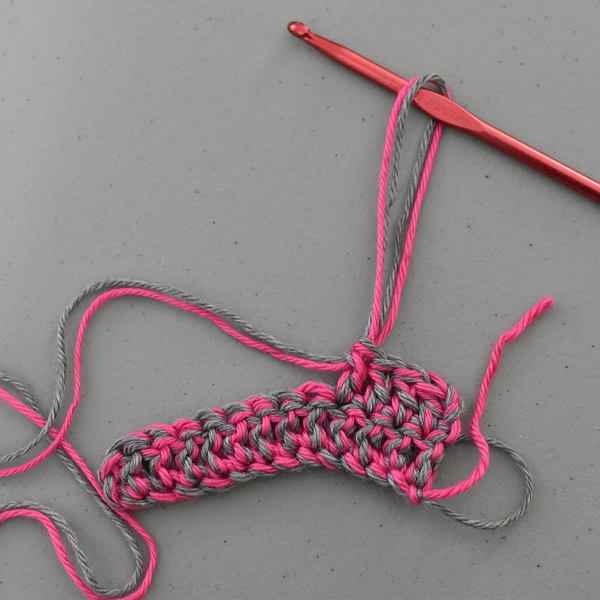
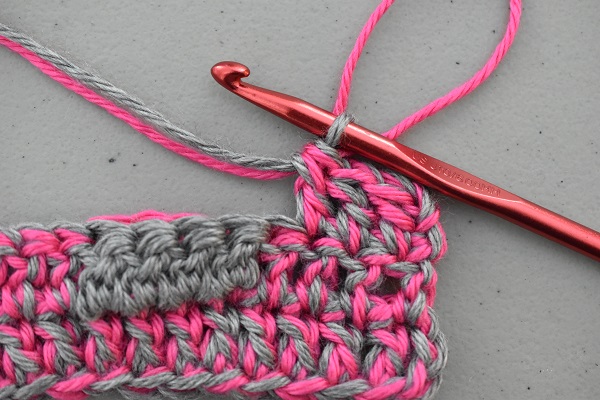
Here’s what the piece looks like from the front at this point. There are four pink stitches between two sets of multi-coloured stitches.

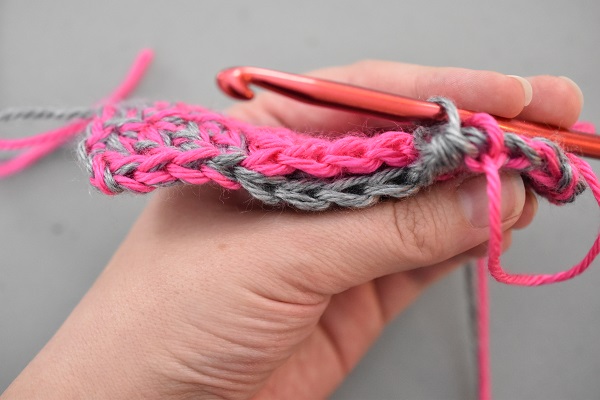
On the backside, you have four grey stitches between the same two sets of multi-coloured stitches.

Chain your turning stitches and turn the work.
On the wrong side rows, to create the puffy double crochet stitches, the grey yarn will be worked into the front loops, and the pink yarn will be worked into the back loops.
Here’s the next row worked up to the first puffy double crochet. I’ve extended the pink loop and removed it from the hook. The grey loop is tightened up and ready to use.
The next grey stitch is worked into the front loop of the next double crochet, but the following grey stitch is worked into a puffy double crochet.
The puffy double crochet is actually made up of two separate stitches. Here’s the top view.
In this case, the ‘front loop’ is considered to be the two strands of the grey stitch and the ‘back loop’ is considered to be the two strands of the pink stitch. So, the grey half of the next stitch will be worked into the grey loops.
If you are working a normal double crochet into a puffy double crochet, the stitch is worked through all four loops of the puffy stitch (both the pink and grey stitch in this case).
When working multiple puffy stitches in a row it is possible to work all of the front loops before working all of the back loops. This is much faster than needing to switch colours within each stitch.
Here I have finished the first half of each of the six image stitches using the grey yarn.

Here’s a top view where you can see the grey stitches towering over the ledge of unworked back loops where the pink stitches will be worked.

As you work the pink stitches into the back loops you will notice that a pocket forms between the pink and grey stitches.

This is normal. As you continue working an image, regular double crochets will eventually be worked over the image stitches. As already stated, these double crochets are worked through all four loops of the puffy double crochet. This closes up the pocket to complete the image.
A couple of final tips:
Some people find it easier to work the back loop of the puffy stitches before the front loop. Give it a try to see what works best for you.
You can change which colour shows on the front or back of the work based on which yarn you work into which loops. This allows for the creation of two colour images. (See the butterfly above where the body is one colour and the wings are the other).
Have fun!

What a fun technique! Great tutorial…I think I could actually do this.
LikeLike
I really like this👌
LikeLike
I hope you give it a try. I’m finding it quite addictive myself 🙂
LikeLiked by 1 person